
Want to know how to setup a live stream?
This article walks you through 8 steps from start to finish in terms of managing the sources and settings for your live stream. This includes everything from choosing a video source and lighting, to a live encoder and managing your connection. If you consider yourself already setup on the video and audio side, skip to step 4. Also, if you are more interested in perfecting your current setup or curious how to best handle the delivery aspect at scale, watch this Five Video Delivery Mistakes to Avoid webinar.
- Camera or other video source selection
- Lighting setup
- Audio source selection
- Choosing a delivery method
- Selecting an encoder for live streaming
- Inputting encoder settings
- Securing a stable upload speed
- Transcoding
1. Camera or other video source selection
The first step in your live stream setup is to select a video source, or sources. This will often be a camera, although can also be a screen as well, such as a powerpoint presentation or footage of a video game being played as another example. If you are doing a screenshare, this will come into play in step 5 when selecting your encoder.
If you are using a camera, this step will vary based on what kind of camera it is. If you are using a webcam, that’s it. That’s your video source and you will need to connect this to your encoder. If your camera is not a webcam, then you will need a capture card or capture device, depending on your encoder. This is a hardware device that connects to your computer. If you are unsure on if you need a capture card, a simple rule here can be if you intend to use a software based encoder and your camera outputs HDMI, HD-SDI, or component then you’ll need a capture device.
2. Lighting setup
Naturally, if your broadcast is a screenshare, this step can be skipped. If you are using a camera, though, you should consider the lighting of your subject. If you are outside, in a low controlled environment, plan to do some tests at different spots to see what might be optimal for your broadcast.
If you have a more controlled environment, like a studio, consider a three point lighting system. This involves a key light, a fill light and a back light. The purpose of this approach is to properly illuminate a subject in an effective way, avoiding deep shadows. Advantages of three point lighting go beyond just that it’s pleasing to the eye, though, as its also relatively simple to setup. Not only that but by using three different light sources you have more control over how the subject is being illuminated, and control will be a reoccurring theme here.
To better demonstrate this, below is an excellent video walkthrough on setting up lighting for a live stream.
3. Audio source selection
Next up is securing an audio source. This might be one source or multiple, such as using your encoder to bring in additional sources that could include previously recorded audio files.
If using a camera, this could also be a built-in microphone, although this is suggested against. In general you will want to secure an external microphone. This is for both quality and portability. On the quality side, external audio devices give you added support for monitoring the audio while also additional control over elements like gain. The portability is also an important element as it gives you flexibility in your broadcasting. You aren’t tied to doing a shoot with the participant sitting right in front of the camera to pick up their audio. More importantly, you have the freedom to place the mic in the optional position where it can pick up the sound you want, and hopefully avoid the sound you don’t want in your broadcast.
If you want to know more about this step, and the previous two, or are considering establishing a studio, please read our Video Studio Recommendations guide.
4. Choosing a delivery method
With your video and audio source selected, your next step is choosing a delivery method. This can be going direct to a CDN (Content Delivery Network), although if so will add a lot more steps like securing a video player. As a result, for many the delivery method will come down to selecting a live streaming platform to utilize.
IBM Watson Media is an example here. It not only already comes with a video player, but also enhanced delivery capabilities. This is done through a distribution model that includes multiple CDNs. Called SD-CDN (Software Defined Content Delivery Network), this method offers QoS (Quality of Service) where information is relayed from the viewer’s experience back to the platform. One element of this is buffering, and the service responds to this data by trying to optimize the experience. This can include changing not just bitrates but also different CDNs. A side effect of this is not just scalability, but reliability as documented in this Live Video Delivery System Built for Scalability white paper.
5. Selecting an encoder for live streaming
So you have your delivery method locked down, the next step is your encoder. If you are unfamiliar with what a video encoder is and why you need it, in a nutshell it converts the video input into a digital format. In this context, it’s the process of digitizing your video content so that you can send it somewhere online.
There are different types of encoders out there, although a lot of live streaming is done under the RTMP (Real Time Message Protocol) format, which is based on TCP (Transmission Control Protocol). Generally you need to check with your provider before selecting a format, although in the case of IBM Watson Media RTMP is needed. Now this encoder can be software based, hardware based or even “app” based on your mobile device.
A few examples of software based encoders that output in RTMP include:
On the hardware side, a few examples include:
In addition, broadcasters can also use the browser based IBM Watson Media Broadcaster as well, although it has limitations such as not being capable of HD broadcasting.
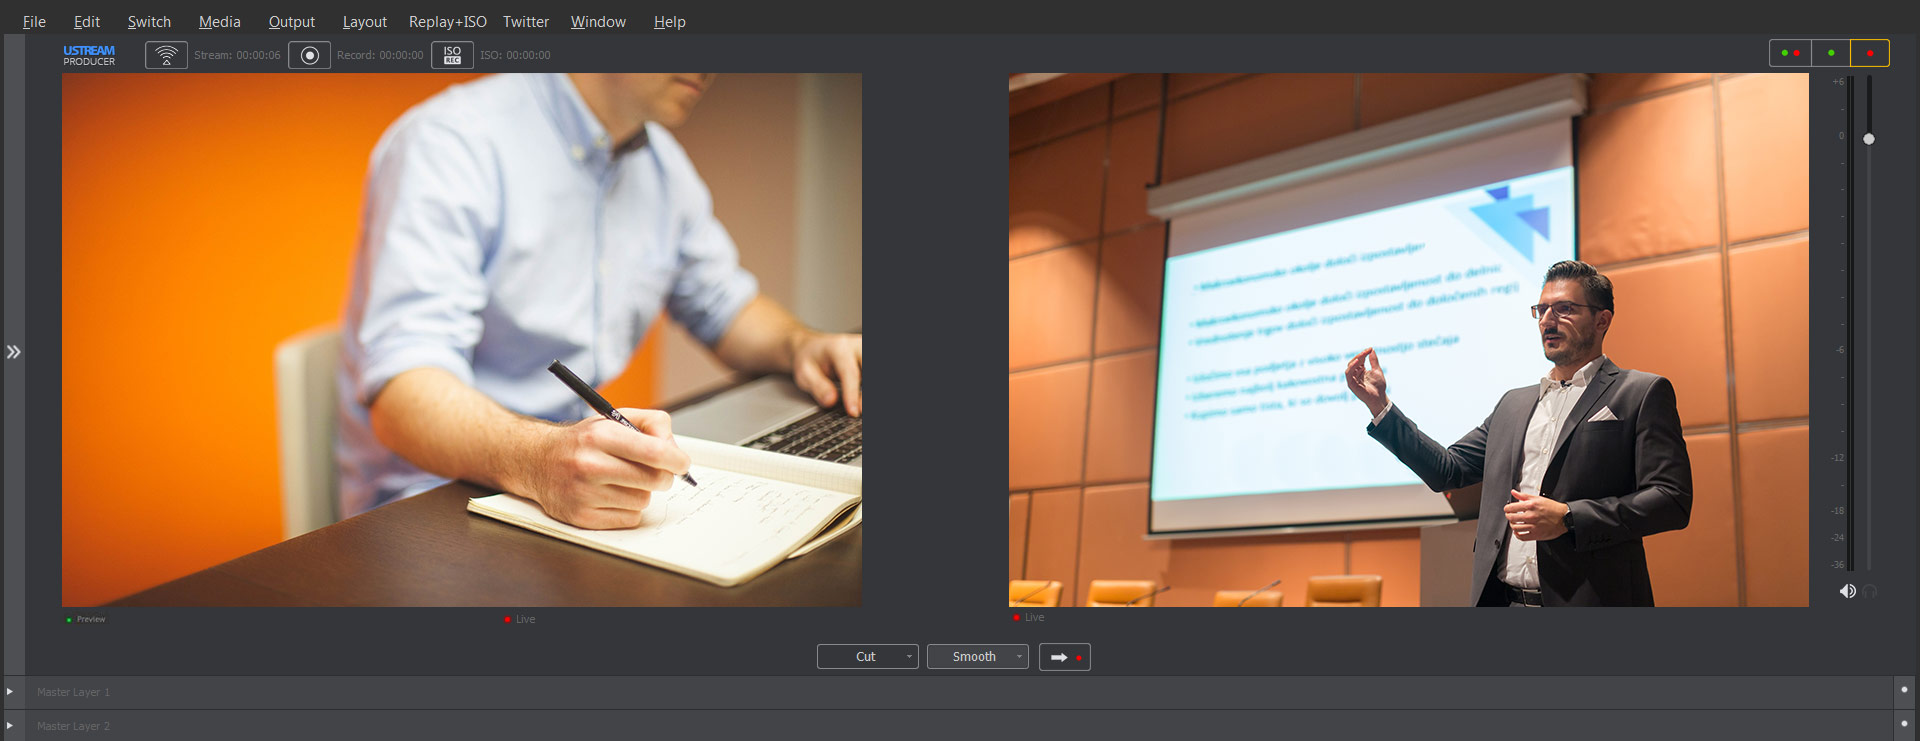
Features across these encoders differ. Some of the software ones, like vMix or Wirecast, can be used to screenshare as well and also switch between video sources. So if you plan to have a multi-camera shoot, or switch between a presenter and a screenshare, factor this into your encoder selection.
6. Inputting encoder settings
 After you have your encoder selected, the next step is entering settings so that you can broadcast to your platform or end source of choice. This will vary greatly based on your provider, although generally it involves entering in an RTMP URL and a Stream Key in the encoder.
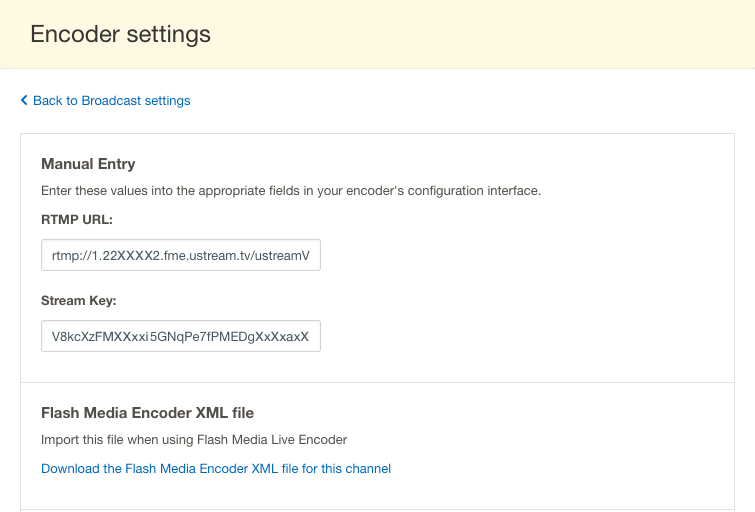
In the case of IBM’s video streaming and enterprise video streaming offerings, this information is found in the dashboard. First click the live channel you want to stream to. Now go to “Broadcast Settings” and then click “Encoder Settings”. This will give you a screen like the left where you are given the RTMP URL and the Stream Key for manual entry into the encoder. If you are using an encoder that accepts XMLs, like Adobe Flash Media Live Encoder, you can also download this file and open it in the encoder, which will remove the manual entry step as these details are contained in that file.
An alternate method to this is logging into your account directly from the encoder. A variety of solutions, from Wirecast to vMix support this. For IBM’s video streaming and enterprise video streaming offerings, this involves using the Device Password feature to generate login details.
After logging in, you can set a few quality options, including the keyframe interval. Usually this should be set for 2 second, and many defaults will be set like this, but if not make sure to do the change. Also disable any “auto” keyframe option that might be on. For more details on this, read our Keyframes, InterFrame & Video Compression article. Another quality option is your resolution and bitrate, the latter of which will be dependent on the next requirement: your upload speed.
7. Securing a stable upload speed
It can be hard to stress how important your Internet connection is as part of how to setup a live stream. To execute a live broadcast, you’ll want a fast, stable connection. Upload speed is the key to delivering a live stream, and one rule of thumb is to secure an upload speed that is twice as fast as the quality you plan to broadcast at. So if you are streaming at 2mbps, you’ll want a 4mbps upload speed.
Make sure to test your Internet speed at the location you plan to broadcast at. Here is an Network Upload Speed Tester that you can utilize. It’s recommended to do the test a few times and then average them to get an idea of your upload speed.
Other considerations include the type of connection you have. If you can, try to secure a wired connection for your broadcast. The reason for this is that a wired connection is both faster and more stable than a wireless connection, both traits that can be instrumental in a successful broadcast. One attributing factor to this is that Wi-Fi is more subject to interference. This can include physical objects blocking the signal to interference from electrical devices or even other Wi-Fi networks. This interference can lead to dropped signals, which might not seem like a big deal when browsing websites and having to click refresh after a failed load, but will be a major issue when broadcasting the signal momentarily hangs or disconnects altogether.
Another consideration to make is to try and get a dedicated connection as well. This means having an Internet connection that is not shared with others. So an office Internet connection that has your whole team working on it is less than ideal. A publicly shared wireless network at an event, though, is a recipe for disaster, especially if other people might be using that same connection to do streaming of their own. If you do have to use a shared connection, add a pretty large buffer in terms of the quality you plan to stream at and your upload speed, since there is a variable for how much upload speed will be there when you start to broadcast.

8. Transcoding
The last piece of the puzzle is transcoding. While RTMP is a common format for live encoders, it’s associated with Flash technology, which, as noted in this HTML5 Video Player versus Flash article, is not just aging but widely unsupported over mobiles as well. As a result, live transcoding for mobile compatibility to iOS and Android devices is recommended.
While you could potentially try and do a broadcast without transcoding, which does have the benefit of reduced delays in the feed, it’s not advised. The reason being that mobile viewership for live streaming is on the rise. In fact, it grew from 25.7% in 2015 to 47.3% in 2016, as noted in this Video Trends to Look for in 2017 presentation. As a result, reaching this audience has quickly grown from a “nice have” to a necessity.
Transcoding is normally done as part of the delivery process. In other words, this is usually dependent on your provider. In the case of IBM Watson Media, live content is automatically transcoded when streamed. This is not just for mobile compatibility, but also to create additional bitrates for adaptive streaming. If you aren’t sure if you provider does transcoding on your stream, ask them. In particular look for how or if they are able to reach mobiles as part of this process.
Summary
Setting up a live stream is something that might feel difficult, but often comes down to making a few choices that will dictate the others steps, such as what video sources you want to use and how you plan to deliver the feed. Other aspects, like lighting and determining if you have an adequate connection, come more naturally with experience after a few broadcasts under your belt.
If you want to learn more about live streaming, and are interested in doing so with IBM Watson Media, be sure to watch this Demo Video: Getting Started with Enterprise Video Management.